Showing posts with label bag. Show all posts

Monday, June 21, 2010

Layers of Shells


These are really quick little bags to make up. Good for small gift bags, the kids can use them to keep little treasures in. Or make it taller and use as a gift bag for wine bottle. :o)

I used an H hook and worsted weight yarn

Rnd 1) ch3, 12dc in 3rd ch from hook, sl st to top of first dc made. (12dc)
Rnd 2) ch2, 2dc in each st around, sl st to top of first dc made, skipping ch2 (24dc)
Rnd 3) ch2, * 2dc in first st, dc in next st, repeat from * around, sl st to top of first dc made
Rnd 4) ch2, * 2dc in first st, dc in next 2sts, repeat from * around, sl st to top of first dc made
Rnd 5) working in back loops only for this round, ch1, sc in each st around
Rnd 6) ch 1, * sc in first st, skip next 2sts, 5dc in next st(shell made), skip next 2sts, repeat from * around, sl st to top of first sc, 8 shells made
Rnd 7) changing color, ch3, 2dc in same st, * sc in 3rd dc of shell, shell in next sc, repeat from * around, 2dc in same st as first ch3, sl st to top of ch3
Rnd 8) changing color, ch1, sc in top of ch3, * shell in next sc, sc in 3rd dc of shell, repeat from * around, sl st to first sc,
Rnd 9) changing color, ch3, 2dc in same st, * sc in 3rd dc of shell, shell in next sc, repeat from * around, 2dc in same st as first ch3, sl st to top of ch3
Rnd 10-11) repeat rnds 8-9
Rnd 12) ch1, sc in first st, and in next 2sts, * dc in next 3sts, sc in next 3sts, repeat from * around,
Rnd 13) drawstring row. ch4, skip next st, * dc in next st, ch1, skip next st, repeat from * around, sl st to ch 3 of first ch4
Rnd 14) ch1, sc in same st, sc in each st and ch space around, sl st to close
Rnd 15) ch2, 3hdc in same st, * skip next 2sts, 4hdc in next st, repeat from * around, fasten off weave in ends.

Using a strand of each color held together,(Make 2) ch 40 or desired length to use as drawstrings weave in and out of rnd 13
Have fun and happy hooking

Wednesday, November 18, 2009

Any Way You Want Pouch


This bag is very simple and easy, with so many color combination possibilities.

I used an H hook and Red Heart Super Saver Yarn, but any hook and yarn size would work, it just alters the size of your bag. This is a little bit rough explanation. Beads are optional but add a nice touch.

Make 5 basic granny squares (you can find several styles all over the net) in any size you like, mine were only 3 rnds for this. Use one for the base and then attach one on each side of square ane then sew up sides.
For Top closure
RND 1) attach yarn in any spot of a square and DC evenly around each of 4 square tops, sl st to first dc
RND 2)ch3 (counts as first dc and ch1 space) skip next st,* dc in next st, ch1, skip next st, repeat from * around, sl st to second ch of beginning ch3
RND 3) DC in each st around, st st to first dc, fasten off and weave in ends.

I made two drawstrings of about 70chs long and weaved in and out of RND 2. I also added some beads to each end of drawstring.

Tuesday, August 4, 2009

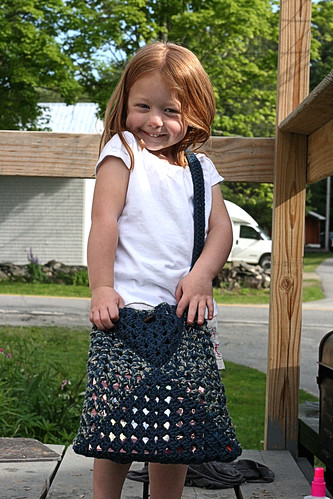
Diamond Granny Bag


I made this bag almost a year ago, but thought I would share this one too. It's another granny square bag, similar to the Get Your Granny On. Gauge is not important, I think I probably used an H hook or an I hook. You can find granny square patterns all over the net, in many different versions, this is just the original granny square.
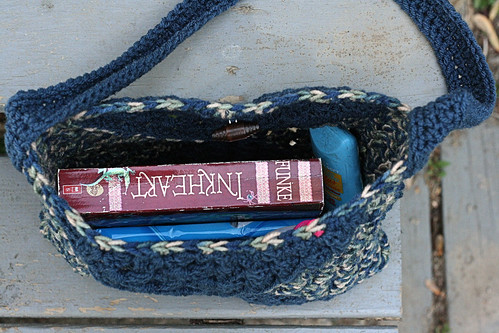
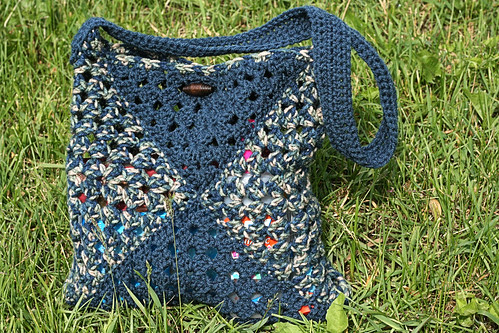
This is just a rough explanation of what I did. Hopefully the picture will help you along a little.

I made 4 squares doing 8 rounds each. This is just a matter of preference, make larger or smaller by adjusting your rounds to what you like. I used two for the bottom standing on a corner and attach by either whip stitch or if you prefer single crochet to hold together. Start from one corner down one side and up the second. Then take another square for either side of bag and attach by floding in half by matching two corners together and fitting down the sides of the two bottom squares on each side. For a strap I just made a chain for whatever length, then hdc around adding a few stitches to the corners to make them rounded and then hdc along the back side of chain, and then sc around for round 2. I made mine long enough to be able to go from one shoulder and hang accross my opposite side. Being sure to remember that if you don't line the strap it will have to give to it and stretch some. I attached mine to the corner of the side squares. I did make a lining for this to keep all the little things in place. Please message me if you have any questions. I am just remembering this from the bag I gave away.

Monday, July 20, 2009

Littlest Pet Carrier


This is a small bag made by using the basic solid granny square. I used an H hook and worsted weight yarn. But anything really will do. Gauge is not important. It can be made larger or smaller by changing hook size or by changing the number of rows. You will need to know how to do a front post double crochet-FPDC and a back post double crochet-BPDC
A button for closing if desired

With H hook and ww yarn Main color

Basic solid granny

Rnd 1) ch4, sl st to first ch to form circle, ch3, 2dc in circle, * ch2, 3dc in circle, repeat from * 2 more times, join to top of ch3
Rnd 2) ch2,(ch2 does not count as first dc through granny square) dc in same st and in next 2sts, * [2dc, ch2, 2dc] in ch 2 space (corner made), dc in next 3sts, repeat from * around , join to top of first dc skipping first ch2
Rnd 3) ch2, dc in same st and in each st to corner ch2 space,* [2dc, ch2, 2dc] in corner, dc in next st and in each st accross to next corner, repeat from * to last corner, make corner, dc in next st and in remaining sts to first dc, sl st to join
Rnd 4-6) Repeat Rnd 3 increasing happens in the corner.
changing to CC
Rnd 7 and 8) Repeat Rnd 3 Fasten off
Fold square in half and sl st or whip st sides together

Top border
Rnd 1) attach yarn at a corner of the square, ch 2 (which NOW counts as first dc), dc in nest st and in each st around
Rnd 2) ch2,* FBDC in next st, BPDC in next st, repeat from * around, join to top of ch2
Rnd 3) Repeat Rnd 2
Rnd 4) ch2,* FPDC in next st, BPDC in next st, repeat from * for a total of 15 sts, ch1, skip next st,(button hole made) FPDC in next st, BPDC in next st around to end of rnd, sl st to top of ch2
Rnd 5) ch1, sc in same st as join, sc in each st around join and fasten off, weave in ends.

For a strap I used a P hook and 4 strands of yarn held together and chained about 60 attaching at sides of bag. Add a button of your choice and fill with Little Pet shop pets :o)

Please link back to my page if you choose to use my pattern, but feel free to gift, sell for craft fairs or whatnot of your own projects.. Happy Hooking!

Friday, June 5, 2009

One More Granny Square Bag


I have become obsessed with Granny Squares again this week... every once in a while I just need to make some. So here is another bag I made yesterday for you to play around with if you like.

I hook and ww yarn

Hopefull you see the layout well enough in the pictures.
I made three full squares done in 7 rounds, attached them by folding them in half and sewing the sides together matching the points. This makes a triangled gap at the top. Here is wher I made two half granny squares doing only 6 rnds and fitting them in and attaching a button and strap. Very simple, and quick to make up.